Showing posts with label try-it tuesdays. Show all posts

Tuesday, July 31, 2012

Try-It Tuesday.... Thangles

Well good morning.... I would invite you in for tea but I am out so I had coffee early this morning. I really needed the caffeine as I was dragging- it was cool in the mid 50's and foggy. I was under a quilt so what can I say I know how the bear feels when he is just coming out of hibernation!
Once again it is Try-It Tuesday, I have no idea where the week has gone except work!  I am still waiting on my bunnies to have the babies! They are due today, the one rabbit always goes 3 days over due date and the other two are first timers with the whole mommy thing! So you know what they say a  pot watched does not boil! Remember to go over to Jo's Country Junction and see what all the ladies are trying over there. Also when you care done visiting Jo's site go check out Tip Me Tuesday and see all the tips and home-made things folks are busy creating!
So today I am going to actually try sewing with Thangles. I know they have been around awhile, alot of people have used them or are using them.  I haven't tried them before, I am too cheap to purchase them especially when I don't know if I will like them or not. I lucked out at the Quilt show this last weekend and got a package that has size 1, 2, 2.5, 3 in there with a pattern to boot..... the price was only a dollar! Score me!!! I am working on graduation quilts and other gifts so I thought I would give them  a try.

This is the packet that I bought for a $1.00! Can you believe it! The picture is upside down but I want it at the beginning of the pictures so you can see what the Thangles look like! Computers! Or in this case humans! LOL I just don't want to download all the pictures again! 


So I ironed my fabric that I chose.


Then you put the like sides together. The directions say put the lighter fabric on the top and then the seam allowance will go
to the darker fabric.


Then you add the Thangle paper and pin it down. If you want your half square triangle to be finished at say a
2" than you cut your fabric 2 1/2 wide.


Here I am almost ready to sew. You will be sewing on the dotted lines, and cutting them apart on the solid lines!

As you can see my first attempt was wrong! Yes I sewed the solid line! Duh! Well lesson learned. =) I am also using my industrial sewing machine -Sushi is her name. She is fast! So I had to control her!


Here is a close-up to see how I got the needle right on the line and then actually put the needle through the paper before sewing with the foot peddle. Like I said Sushi is fast so I don't want to unthread the needle being I have it centered on the line so well! Remember you should have it centered on the dotted line!

So you are sewing on both of the dotted lines on each piece- which will give you 4 half square triangles. You will be cutting between the two lines that you sewed and between the two solid lines  that seperates the two Thangle pieces.

As you can see I was way better on sewing the one on the left! So yes, following a line will take some getting used too!


So I cut on the middle line- which I had sewn as you can see.


Here it is as I started ripping them apart. When you sew with the stitches so close together it rips easy. Also I realized after ripping them apart that you should wait til after you press them, then rip apart, that the seams don't stretch. Second lesson I learned!


I used the size 2.5 and I will get 4 of these cuties out of each Thangle paper.


This one needs to be cut down the middle solid line and then cut on the solid line at the top of the Thangle..


After ripping you have paper to recycle.


Before pressing open.


After pressing open. You will have to trim off the little point popping out of the bottom of the square.


Here are the finished project. I am excited that so far this morning I have added 4  half- square triangles to my bin. I have to say they seem alittle putsy, learning a new thing, trying to get the dotted lines sewn right and then cutting them apart. I think if all your fabric is put together, cut out and they are all put together with the paper it would go alot faster to just sew them up, put  them in a bin to rip later. Then what I would do is rip them apart while watching a movie.

Thanks so much for stopping by. Feel free to leave me a message. Let me know if you have ever made anything with Thangles. If you would like to buy Thangles I am sure your local quilt store might stock them or I am sure that they would love to order them for you!
Happy Sewing!


Tuesday, July 24, 2012

Try-It Tuesday- African Violets!

Good morning friends. I am pleased that you stopped by to visit my blog. Today is Try-It Tuesday, orginally thought up by Jo over at Jo's Country Junction. On Tuesday we try out things we would like to "try" . If you have come here before then you know I always ask you  to go check out Jo's site and see what her readers are "trying" and of course see what she has made. She has made some wonderful quilts! I do not know how she gets so much done, I wish I was that fast!
Today I started out with my African Violet that I bought at the grocery store about 5 months ago, it was a house warming gift to myself. I love the color and when I first bought it it was a healthy plant, not huge and had like 2 flowers. Not the same plant today!

The Violet is in a west facing window and has really taken off. I also have a Hoya in this window that has grown like a weed as well. This plant was small but hea;lthy when I bought it, 2 flowers and 8-10 leaves. Not any more!


I really like this color. I have not seen it on any other African Violet, it was the only one at the store. All the rest were purple and pink.

My first thing to do was to get the flat that I used before. These leaves that you see were harvested off a African Violet plant at my job, I have no idea what color the flower will be. I started 4 from leaves and three are still alive and thriving.


First thing I did was put water in there so that the soil can have time to really let it sink in. I will use these 6 starter  holes on this side, and the 6 on the other side as well. I will transplant the 3 that are already started into their own cups.


First I used a paring knife and cut a healthy leaf off the main plant. I used different leaves as I am not sure if the healthy new thick leaves will create a new plant better than a leave that is older and further from the plants core. This is Try-It Tuesday so I figured I will take the time and start as many as I can from various leaves  and see what I get. After cutting the leaf I then dipped it in water.... 


Then in root starter- I used Take Root Rooting Hormone by Shultz, I just bought it at Walmart.


Not a good picture, but I wanted you to see it is clumped on the end, just shack it off alittle.


Then dig a little hole and pop it in. I like to keep the leaf up alittle so it is not laying on the dirt. Violets seem to be picky about their leaves.


This is the seed starter that I used in the yogurt cups.

The leaves were dug out with a spoon and put in their yogurt cup, more soil was added. Watered.


This is how much soil I added before put the leaf in with the soil that they already had around their roots.


As you can see there are a bunch of new leaves coming out. That is why I decided to trim as many leaves off and give the plant some room to breathe. Also I think it will be fun to share some little African Violets with my friends. Friend plants have been started!  

Here are the difference between the leaves. The lighter one is from further out on the plant. The darker one is from closer to the plant- thicker and daek. I guess we shall see which creates a better plant.

Close-up of more leaves and tiny flowers that will be coming out!

The finished leaves all put to bed in their own holes. There are two cells that have 2 leaves in them. I am not sure how many will turn into plants. I was happy last time that 3 out of the 4 that I planted are still alive so I am hope 10 out of 14 this time. We shall see. This was a fun experience. I will have to update everyone as they grow!


Thanks again for visiting the blog. Let me know what you are growing or if there is something I need to know about African Violets. Make sure that you go check out Jo's Country Junction

Tuesday, June 12, 2012

Wisconsin Quilt Shop Hop- June 8-24, 2012

Hello there friends Thank you so much for taking time out of your busy day to see what is going on here at the farm. If you have hopped over from another blog welcome!! Jo's Country Junction is doing her Try- it Tuesday, you try differnt things on Tuesday. Sometimes they work and well sometimes they do not. Of course Tip Junkie has her home made link up today as well. Both sites have great things to look at and learn how to do. So if you gt time bop over and find something new to try. What I am trying to do is get to all the quilt shops in my section (section 4) for the first ever Quilt Shop Hop! So far I have made it to 3 of the 13. It has been fun to see how different each shop is, what they make for demos, how they display things. How much goodies they stock to make you drool and want to clone yourself so you can accomplish making them ALL!!!! As I have gone to the different shops I have had the pleasure to meet some great folks. When you go to the shops make sure you get a passport so that the shop person can stamp it. Also each store has designed a block using the fabric that has been created just for the Shop Hop - so make sure you get a block at each place!!
This is the Busy Bobbin- Rice Lake, WI  They carry a lot of stuff in the ground level store!! Ii really like the block that they designed. Their website Busy Bobbin

This is Thimbles Quilt Shop in Trego, WI. This is quilt shop is pretty close to me. I like that she had little stop in and learn something to make on Saturdays during the winter. One was an apron, an ironing board cover- quick,cute and fun! You can check them out on their website Thimbles

Ok so this next place is like my DREAM store. It is how I always think a Quilt store should look like. I would LOVE to own a quilt shop and have yarn and goods in it but it would have to look something like this.
These folks are located in Ladysmith, WI. The website is www.heartlighthouse.com- when you go to the site check out the shop hop tab. They have some great projects made with the Wisconsin fabric!

This is the shop from the front- why yes those are all kinds of goodies on the front porch!

Now I am not the most educated but I think this pattern is called Bobbins- ither way that is what they look like and are CUTE!!

Love the quilt on the bench- could you tell it was hot and sultry out yesterday? lol

Is this cute? Plus their plants are soooo nice!

I think is is wonderful when folks use quilts. Not just display them somewhere where they will stay clean and untouched.  Instead really use them to add warmth, character, charm to an area. They have added charm here, makes me want to curl up and read a book! Way to share all the lovely quilts!

This is so me! I was just sharing with my daughter this weekend that my Grandma Andre' had one of these and she would have me help her! What a great way to display this old gem!

This as well as the Dresden plate are two of my favorite patterns!

I am currently working on paper piecing some hexies together- mine are smaller than these. Just think of all the time and workmanship that went into this! Lovely, just lovely!


Bright, fun! I really need to start using some brighter fabric. I always think things like this are cute when I see them but I never think to make them. hmmm ned to put that on the bucket list.


A warm and welcoming quilt, love the colors!  Blue is another color I just never pick to work with!
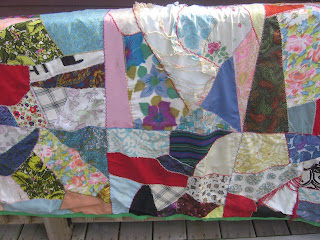
I am a scrap quilt kind of girl. It must be the thrifty in me. Before really getting hooked up through the internet I always thought scrappy had to always look kind of like this I love the crazy quilt feel, look as well as the stitching that goes with it. I  know now you can do various quilts with scraps and upcycled fabric and they can be in various patterns such as the dresden plate- thrift stores are a great place to shop for 100% cotton shirts!


Just check out the little stitches! Wow.

Here is another one that is displayed in the back of the shop!

I have to say I am really getting into stars lately. I have done some wonky ones, might have to try something like this.
Please go check out some of the folks that I have shared today. I would love to hear what you are working on. I can't show you the blocks that I got at each of the stores as it is a mystery quilt and I would not want to spoil the fun for others. I will of course share them once they are made- I can wait to get the rest of the blocks! What are you working on? I need to go shopping at some point and get a quilt to display on my porch or the fence or put on my bed. That is another thing to try.